I had a couple of Sonoff TH10 wifi switches laying around but didn’t like the original Sonoff firmware. Tasmota looked like it would do what I needed so I started down that path. Being a Windows GUI user primarily, I found the various command line methods confusing and awkward. After fumbling around and getting nowhere I ended up using NodeMcu Flasher program.
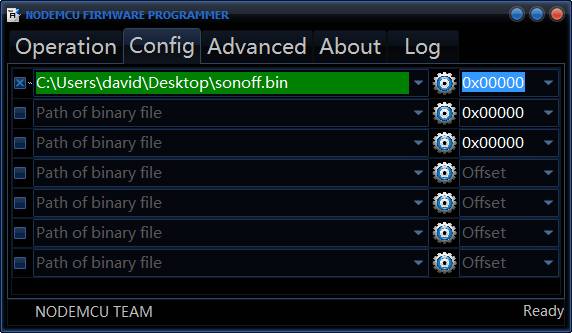
Use the gear icon on the first line to browse to and select the sonoff.bin file that you downloaded from Github. Set the address (right column) to 0x00000 and make sure the checkbox on the left is selected. All other lines are left deselected.

Select the COM port that corresponds to the USB adapter you’re using to program the Sonoff. Press the Flash button to start the programming process. If the progress bar doesn’t move after a while check that you have the tx and rx connections around the right way. Flashing my Sonoff took a couple of minutes.
After the flashing operation, power cycle the Sonoff module and use your phone / laptop to see the list of available APs. The newly flashed Sonoff should appear in that list under “Sonoff-xxxx”. Take note of the name as you’ll need it later. Connect to it (no password required) then launch a browser. You should be taken to the Sonoff’s main page where you can set it up as below:
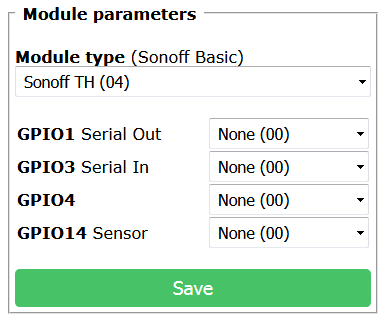
Select the type of module you have from the drop down list. This tells the firmware what pins on the ESP8266 do what for your particular case.
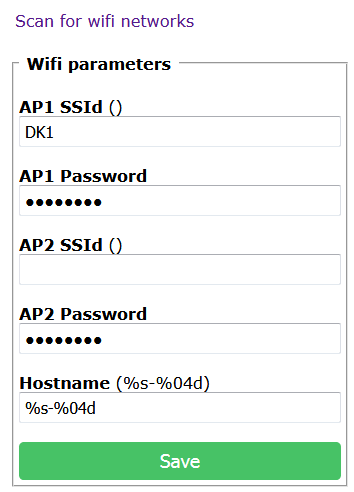
You can have the unit scan for wifi networks so you can select it from a list, or you can manually key it in. Set the SSID and password for your network and press Save. The unit will reboot and attempt to join the specified network. You will have to contact the module on new network as it will no longer be on its own one. Now, on your regular network point your browser to “Sonoff-xxxx.lan” (the name you noted down earlier + .lan added) and that should connect to the new unit. If you forgot to note the name down, use a network scanning tool to locate the new unit on your network. Go into the Console section and type “Status 5” to make sure that the Gateway setting contains the IP address of your router so that the timer can access NTP and set it’s own time. If this is blank or wrong your timers will never fire at the correct time of day as the unit will have no idea of the actual time.
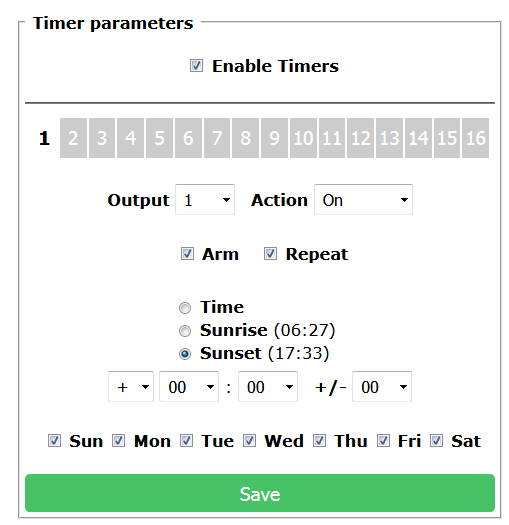
The various on and off times are set in the Configuration > Configure Timers section. Make sure that you check the Enable Timers box at the top. There are 16 timer slots, selected near the top of the page. Select a slot, set the Action (on/off), check the Arm box (and Repeat box if you want the action to happen more than once), what type of event, time and days. Press the Save button to save the changes.
Now you could assume that that’s all you need to do. I did and was wrong. Something that’s not shown anywhere in the Tasmota GUI is the current time and time zone. You have to set that via the command line in the Console section. (list of commands here) I used Timezone 10 to set my timezone to GMT+10. Use the TimeDST and TimeSTD functions to set the start and end of DST. In my case we don’t have DST so both can be set the same. TimeSTD 0,0,1,1,0,0 (standard start) and TimeDST 0,0,1,1,0,0 (daylight savings start) .
The other thing I did was set the latitude and longitude (use Google to find the coordinates for your location) so the sunset and sunrise functions would calculate correctly. This is again done in the Console. Use the Latitude x and Longitude x (where x is the latitude or longitude Google gave you) commands to set them.